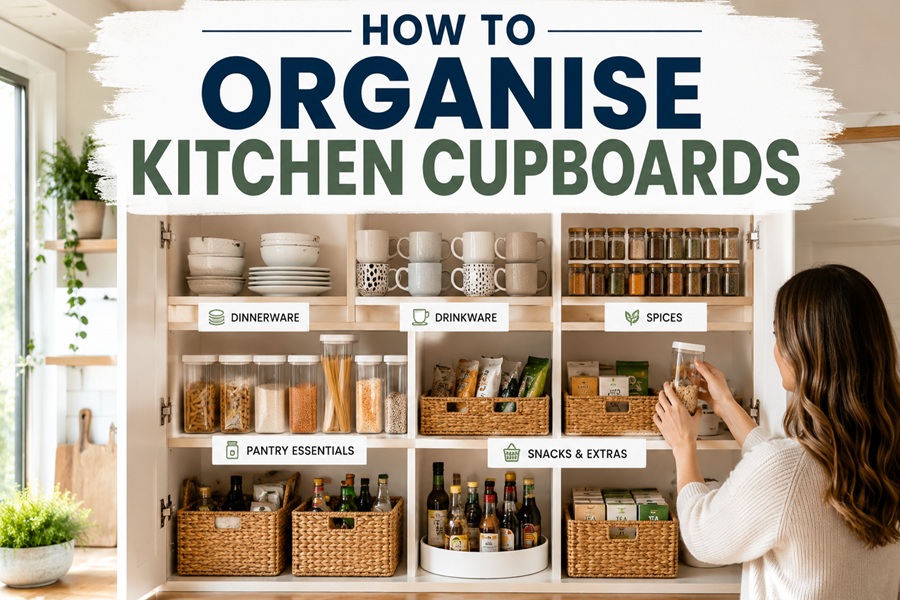
To organise kitchen cupboards, empty every cupboard completely, declutter what you no longer use, then group what is left into categories and assign each a zone based on where you use it. Keep everyday items at eye level, send occasional items up high or to the back, and only buy storage after decluttering, never before. Zoning by workflow and buying containers last are what make the system actually hold.
Most kitchen tidy-ups fail for the same two reasons: people organise around clutter they should have binned, and they buy baskets and jars before they know what they own. This is a repeatable system that fixes both. Follow the order and your cupboards stay sorted, not just for a week.
Why does organising kitchen cupboards usually fail?
Because people skip the hard first step and rush to the fun one. The two classic mistakes:
- Organising without decluttering. There is no point building a neat system around duplicate baking tins, gadgets you never touch, and food lost to the back of the shelf.
- Buying storage first. Containers, risers, and turntables bought before you declutter almost never fit what you actually keep. You end up with more clutter, not less.
Professional organisers are near-unanimous on this: declutter first, buy storage last. Get the order right and everything else follows.
Step 1: How do you start organising kitchen cupboards?
Empty everything out. This is non-negotiable, and it is where the real work happens.
- Take everything out of every cupboard, shelf, and drawer.
- Lay it all out on the worktop or table so you can see the full picture.
- Wipe down the empty shelves with hot soapy water and let them dry. Starting clean makes you want to keep it that way.
Seeing everything in one place is a shock in a useful way. It exposes duplicates, out-of-date food, and things that were never meant to live in the kitchen at all.
Step 2: How do you declutter what you actually own?
Now sort the pile with a firm hand. Be honest about what earns its space.
- Bin or recycle anything expired, broken, or past saving.
- Donate duplicates and the gadgets, dishes, and serving pieces you genuinely never use.
- Relocate items that belong elsewhere in the home.
- Keep only what you use and have room for.
A good prompt while sorting: if you forgot you owned it and would not miss it, it probably does not deserve prime cupboard space.
Step 3: How do you group items into categories?
Before anything goes back, sort the keepers into clear categories. This stops similar things ending up scattered across five cupboards.
Common categories:
- Tableware and glasses
- Cookware, pots, pans, and lids
- Baking supplies (flour, sugar, tins, measuring tools)
- Dry goods (rice, pasta, pulses, tins)
- Herbs, spices, and oils
- Small appliances
- Cleaning supplies
Grouping like with like also means you can finally see what you have, which stops you buying a fourth bag of flour you did not need.
Step 4: How do you assign zones to your cupboards?
This is the heart of the system. A zone is a cupboard assigned to a task, placed near where that task happens. Zoning by workflow shortens the distance you move around the kitchen and makes putting things away instinctive.
The core zones most kitchens benefit from:
| Zone | What lives there | Where to put it |
|---|---|---|
| Prep | Knives, chopping boards, mixing bowls | Near the main worktop |
| Cooking | Pots, pans, cooking utensils, oils | Beside the hob and oven |
| Baking | Flour, sugar, tins, scales | One dedicated cupboard together |
| Food / pantry | Dry goods, tins, spices | Cool cupboard, near the fridge |
| Cleaning | Washing-up items, cleaning sprays | Under or beside the sink |
| Crockery | Plates, bowls, mugs | Near the dishwasher or drainer |
As professional organisers put it, keep things close to where you need them. Herbs and spices near the hob, crockery near the dishwasher. That small logic saves countless steps a day.
Step 5: How should you arrange items by height?
Once each cupboard has a zone, arrange within it by how often you reach for things.
- Eye level and easy reach: everyday items, your daily mugs, plates, cooking oils, go-to ingredients.
- Higher shelves and the back: occasional and seasonal pieces, big serving platters, holiday bakeware.
- Awkward corners and deep, hard-to-reach cupboards: bulky, rarely used items.
Sort by frequency into everyday, weekly, and monthly-or-less, and let that decide the height. Your best cupboard real estate should hold what you use daily, nothing else.
Step 6: Which storage solutions are actually worth buying?
Now, and only now, buy storage, because you finally know exactly what you need. The ones that make the biggest difference:
- Shelf risers to create a second tier and stop stacking towers.
- Lazy Susans (turntables) for corner cupboards, so nothing gets lost at the back.
- Pull-out shelves for deep base cupboards, bringing everything to the front.
- Drawer dividers and inserts to tame utensils and cutlery.
- Over-the-door organisers on the inside of cupboard doors for spices, wraps, or cleaning supplies.
- Under-shelf baskets to reclaim the dead space beneath a shelf.
- Uniform, clear containers for decanting dry goods, which saves space and lets you see stock at a glance.
In UK kitchens, a pull-out larder unit in a tall cupboard is one of the best upgrades for easy access to dry food, and integrated organisers keep everything hidden behind cupboard doors.
Step 7: How do you label so the system lasts?
Labels turn a one-off tidy into a system anyone in the house can follow.
- Label shelves and containers by category so everything has an obvious home.
- Labelling makes it clear where things return to, which is what keeps cupboards tidy over time rather than sliding back to chaos.
How do you keep kitchen cupboards organised long term?
A system only works if you maintain it. A light routine is enough:
| Task | How often |
|---|---|
| Return items to their zones | Weekly tidy |
| Audit for expired food, re-sort | Monthly, about 30 minutes |
| Wipe down shelves and cupboards | Monthly |
| Reassess the layout as habits change | Every few months |
One habit does more than any container: check your cupboards before you shop. Overbuying is the fastest way back to overflowing cupboards. A quick look before the shop stops the duplicates that started the mess in the first place.
What do professional organisers recommend?
The consistent advice from UK home organisers and decluttering pros:
- Declutter before you organise, and organise before you buy. Nearly every professional leads with this.
- Zone by where you use things, not by what looks neat, so the kitchen flows.
- Keep worktops clear. Only daily-use items and things you enjoy looking at should stay out. Everything else gets a home in a cupboard or drawer.
- Maintain little and often. A weekly reset and a monthly audit keep the system from collapsing.
Frequently asked questions
What is the first step to organising kitchen cupboards?
Empty everything out completely, then declutter. You cannot organise what you cannot see, and you should not build a system around things you do not use.
How should I arrange my kitchen cupboards?
By zones tied to tasks, placed near where you use them, with everyday items at eye level and rarely used items up high or at the back.
Should I buy storage containers before organising?
No. Buy storage after decluttering, so you only purchase what genuinely fits what you keep.
How do I organise a small kitchen with few cupboards?
Declutter hard, use vertical and door space, keep only daily items on the worktop, and move rarely used gadgets out of prime cupboards.
How do I stop my cupboards getting messy again?
Label homes for everything, do a weekly tidy and monthly audit, and check what you have before shopping to avoid overbuying.